About Geofencing
A geofence is a map area you draw around part of your service territory — a city, a region, a customer's site. LocateOps automatically works out which geofences each ticket falls inside, so you can filter the board by area, see per-area workload, and (optionally) restrict a crew to just their patch.
Geofencing does three jobs: it's a filter (narrow the board to one or more areas), it's a dashboard summary (open/late/completed counts per area), and — when you turn it on for a role — it's an access boundary (a locator only sees tickets inside their assigned areas). This guide covers all three.
Geofences are company-wide map areas, not per-user. They're set up once by an administrator and then used across the team. A ticket is matched to an area by its location on the map.
Key Ideas
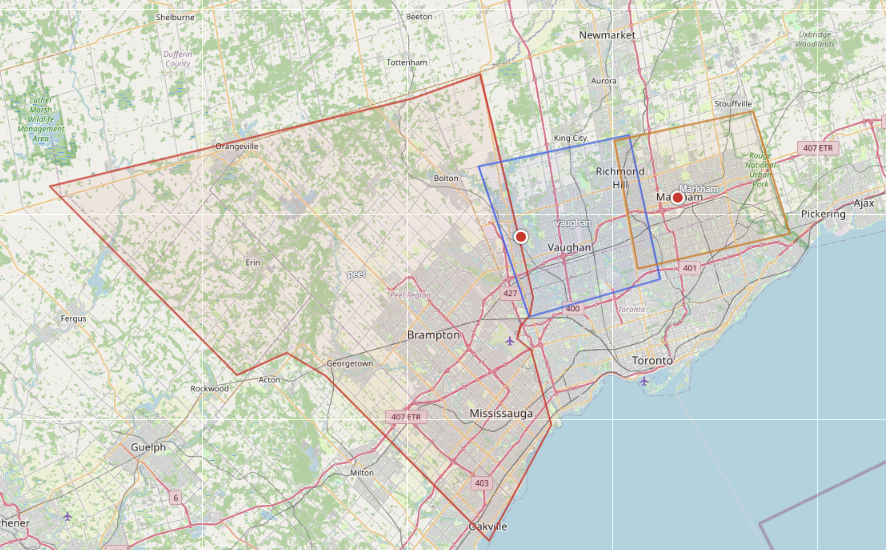
- Geofences can overlap. A single ticket can belong to several geofences at once — a downtown ticket might be in both “Toronto” and “Core Route 3”. That's expected and supported.
- Membership is automatic. When a ticket is created (or its location changes), LocateOps computes which geofences it falls inside. You never tag tickets by hand.
- Tickets with no location are “Ungeofenced.” Some inbound tickets arrive without precise coordinates — those sit in an Ungeofenced bucket until they get a location.
- Assignments connect people to areas. Assigning a user to a geofence puts that area in their board filter — and, if scope mode is on for their role, limits what they can see.
Filtering the Board by Area
The everyday use of geofences: narrow the tickets board to the area you care about.
On the tickets board, open the geofence filter in the filter toolbar. You'll see the geofences available to you, plus an Ungeofenced option and a Clear option.
- Multi-select with OR logic — pick several areas and the board shows tickets that fall in any of them.
- Ungeofenced — show tickets that don't fall in any geofence (typically the no-location ones).
- Clear — remove the area filter and show everything again.

Which geofences appear in your filter depends on your role and assignments (see Who Sees Which Geofences below). The filter combines with your other filters and quick views — for example, “Late tickets in the East End”.
Seeing Geofences on the Map
In the board's Map view, a toggle shows the geofence outlines — each area drawn as a coloured polygon with its name on hover. This appears for anyone whose company has geofences set up.
- Outlines are display-only on the board — they help you see where areas sit; you don't click them to edit. (Editing happens in Settings — see below.)
- Where areas overlap, the smaller area draws on top so you can still hover the most specific one.
Right-click a spot on the board map and choose Save area as geofence to jump straight into creating a new geofence centred there.
Who Sees Which Geofences
There are two different things geofences can do for a user, and it's worth being clear on the difference: an everyday filter, versus an enforced scope.
Assignments = a personal filter
Assigning a user to one or more geofences populates their board geofence filter with those areas. By itself, this is just a convenience filter — it does not hide any tickets. The user can still clear the filter and see everything their role allows.
Scope mode = an access boundary
Scope mode is a stronger setting, turned on per role by an administrator. When a role is scoped to assigned geofences, anyone with that role can only see tickets that fall inside their assigned areas — it becomes an access boundary, not just a filter.
| Assignment only (filter) | Scope mode (access boundary) | |
|---|---|---|
| What it does | Pre-fills the area filter. | Restricts which tickets the user can see at all. |
| Can the user see other areas? | Yes — clear the filter. | No — only their assigned areas, ever. |
| No assignments means… | They see everything their role allows. | They see nothing until assigned to an area. |
| Turned on by | Assigning the user to geofences. | A role permission, set on the role (effectively a site-admin decision). |
Scope mode overrides “view all” and even a user's own assigned tickets. A scoped locator with no geofence assignments sees an empty board and a “You have no geofences assigned — contact your admin” message. Always assign a scoped user to their areas, or they can't work.
Site administrators are never scoped — they always see everything. Scope mode is deliberately a high-privilege setting: turning it on for a role is effectively a site-admin action.
Managing Geofences (Administrators)
Creating and editing geofences lives in Settings and needs the geofence-management permission. It's a desktop task — drawing areas on a phone isn't practical.
Open Settings → Geofences. From here you can:
- Create a geofence by drawing its outline on the map and giving it a name and colour.
- Edit an existing area — adjust its shape, rename it, or change its colour.
- Assign users to a geofence (the per-geofence Assign action).
- Delete a geofence you no longer need.
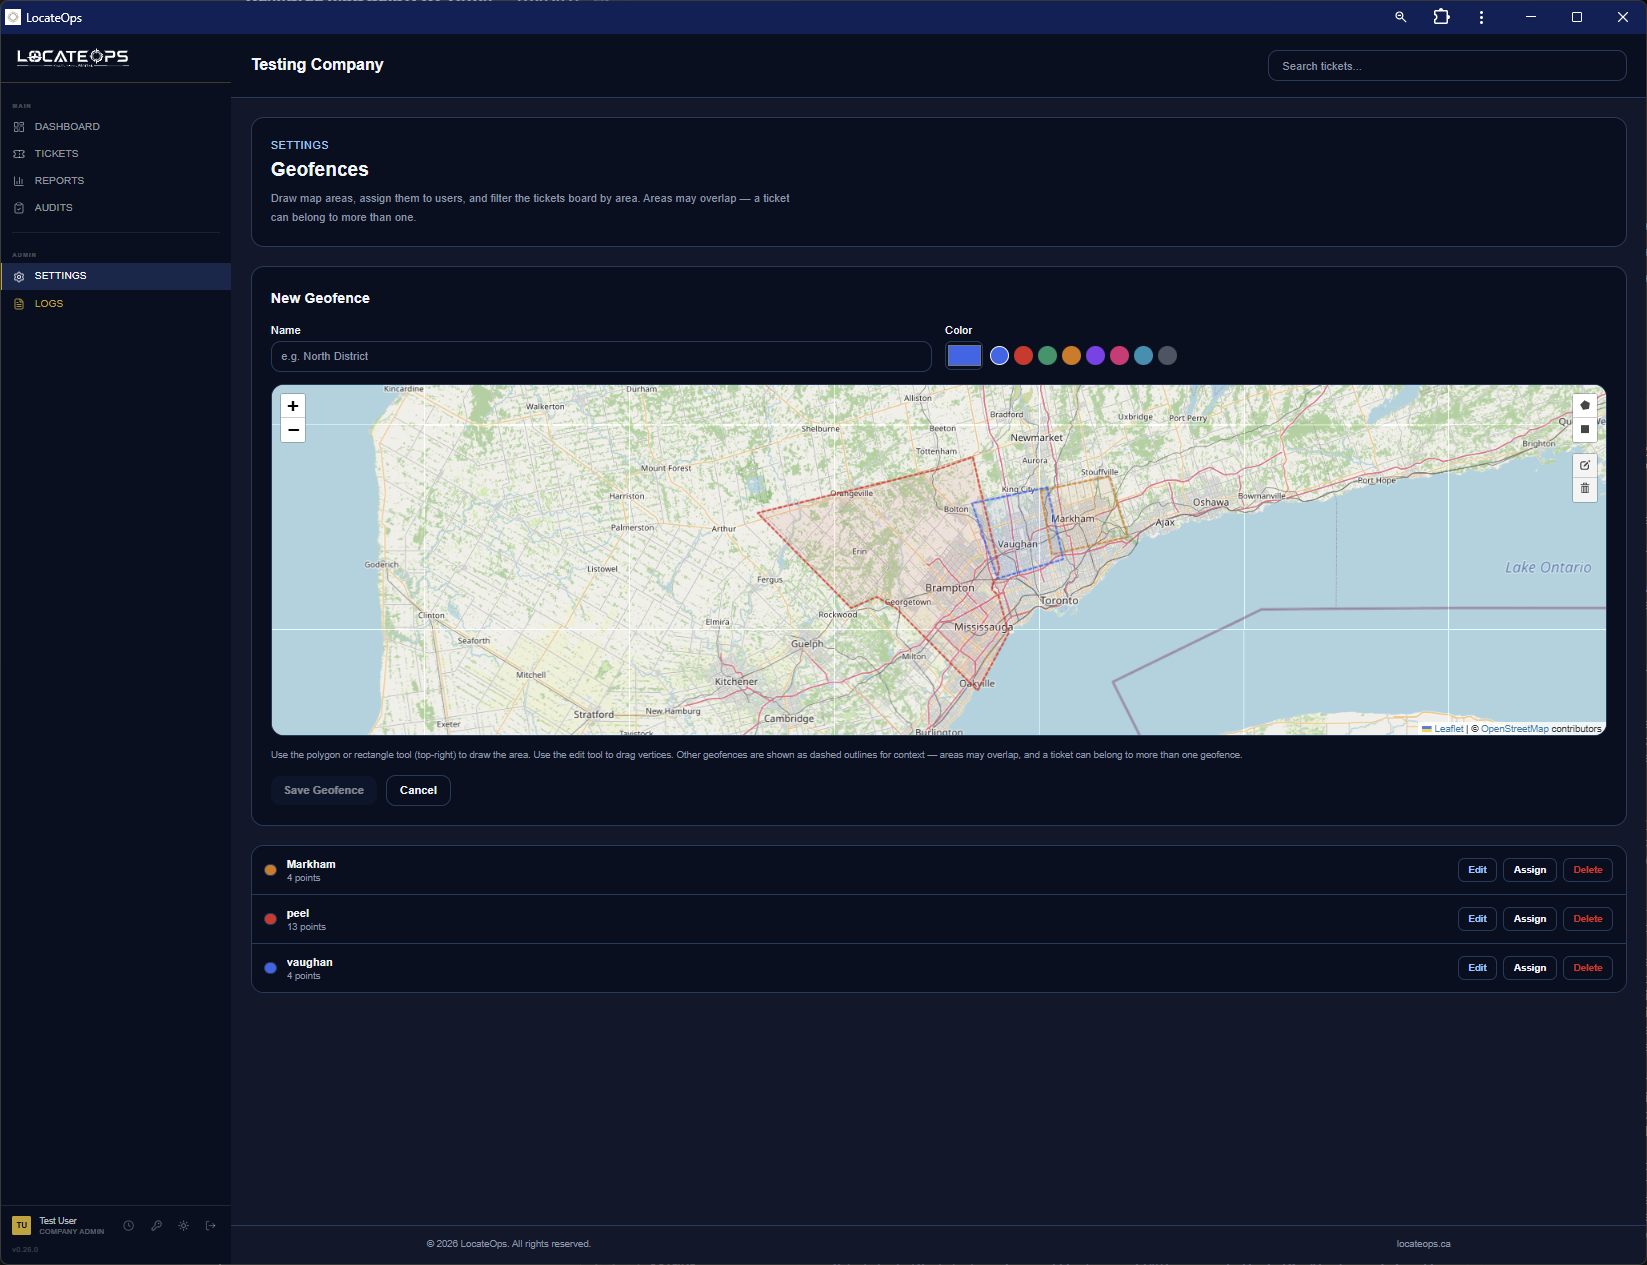
Creating and editing geofences is desktop-only. On a phone the list and the board filter still work, but the draw/edit tools show a “use a desktop” note.
Creating a geofence
- Open Settings → Geofences on a desktop.
- Start a new geofence and draw its outline on the map (click to drop points around the area).
- Give it a clear name and pick a colour so it's easy to recognise on the board.
- Save. LocateOps then works out which existing tickets fall inside the new area in the background.
Overlapping areas are allowed — you don't need to avoid overlaps. Draw the areas that make sense for how you route work.
Assigning users to areas
Use the Assign action on a geofence to choose which users it applies to. For a user whose role is just filtered, this pre-fills their board filter. For a user whose role is scoped, this is what makes their tickets visible at all — so keep scoped users' assignments current.
When memberships recompute
Because a geofence's shape determines which tickets belong to it, changing an area means tickets may move in or out of it. LocateOps recomputes memberships automatically in the background after you create or edit a geofence — a progress indicator shows while it runs. New tickets are matched the moment they're created.
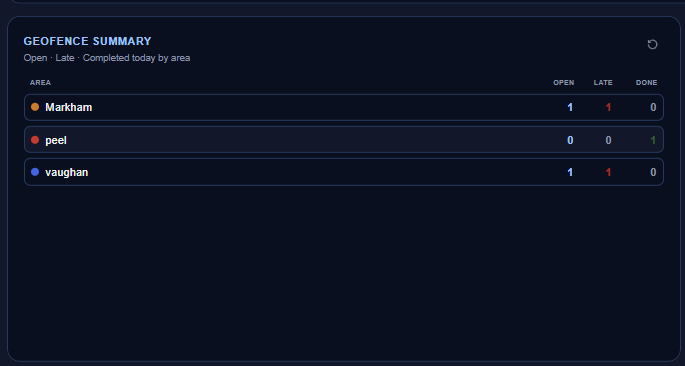
The Geofence Summary Widget
On the dashboard, a Geofence Summary widget breaks work down by area — Open, Late, and Completed-Today counts for each geofence you can see, each row linking straight to the board filtered to that area. It appears automatically when you have geofences to show. See the Dashboard guide.
Common Scenarios
“I only want to see tickets in the east end.”
Open the board's geofence filter and select that area (or several). The board narrows to tickets in any selected area. Clear the filter to go back to everything.
“A new locator should only see their territory.”
Make sure their role is scoped to assigned geofences (an admin sets this), then assign them to their area(s) in Settings → Geofences. Without the assignments, a scoped user sees nothing.
“A scoped locator says their board is empty.”
They have no geofence assignments. Assign them to their area(s) in Settings → Geofences and the tickets in those areas appear.
“Some tickets aren't in any area.”
They're Ungeofenced — usually because they arrived without precise coordinates. Use the Ungeofenced option in the filter to find them. Once a ticket has a location, it's matched automatically.
“I want a new area for a big project site.”
Settings → Geofences (on desktop), draw the outline, name it, and save — or right-click the spot on the board map and choose Save area as geofence.
Gotchas & Tips
Scope mode is an access boundary, not a filter. A scoped user with no assignments sees nothing — assign their areas.
Creating and editing geofences is desktop-only. The filter and list still work on mobile.
Geofences can overlap, and a ticket can belong to several. That's by design.
Membership is automatic — based on a ticket's location, recomputed in the background when areas change.
Give areas clear names and distinct colours — they show on the board map and in the filter.
Right-click the board map → Save area as geofence is the fastest way to start a new area.
Can't find what you need? We respond personally to every message.